Tips 2013 Professional Learning #30 Share your story

21st Century Schools

  • Share your story


      Personal stories are powerful, both for the storyteller and for the listener. The learning involved in composing  a story has many aspects, for example focussing the message, thinking of the audience, communicating clearly and creativity. I have found a compelling way for students and teachers to create animated videos which are a great way to share stories. The application Adobe Voice allows you or your students to create a multi-modal presentation with no tricky editing. You can add your own recorded voice, images, animations and a sound track. This a free app


    My Research — Adobe Voice   http://voice.adobe.com/videos/UEHBnvidWYr

Tips 2013 Professional Learning#29Talking QR Codes

Talking QR codes

We are always looking for ways to encourage our  students to tell their stories or express their learning. A “talking” QR code is a fun activity to engage students young and old. This activity can be used for digital storytelling and to promote literacy as well as mathematical understanding. Use talking QR codes to encourage students to create authentic stories and share them with their peers and their families. Students in early childhood settings can tell the story about their artwork or  read a story they have written. Students who are at  pre-reading and prewriting stages can record themselves “reading”  the print written by their teacher. Older students can add a narrative to a project or make their thinking visible by explaining the process they followed to solve a maths problem. Talking QR codes can be used for learning a language or to describe a science experiment. I am sure you can`t wait to get started, the best part is that it is so easy the students can do it themselves. I have selected a very quick free way to do this in your classroom. It works with a computer or any mobile tablet or smart phone.

How to create a talking QR code

You start by creating a recording and linking to it with a quick response code or QR code.

Scan this QR code and hear how to create an audio file

Scan this QR code and hear how to create an audio file

  • You need to record an audio file and store it online which can be accessed via a QR code.
  • To do this activity  you will need access to wifi
  • Go to this site http://vocaroo.com
  • Vocaroo is  easy to use.
  • It starts recording immediately you just have to press stop when you are done.
  • You can listen to your recording and redo it if needed.
  • It gives you a range of options for sharing the recording- select Qr code on the bottom right hand corner
  • You can read the QR code with any QR code application these are free for mobile devices-
  • If you are not sure go to my  previous post No # 28 which describes how to scan QR codes

Sharing options- click on the bottom right to create a QR code

Tips 2013 Professional Learning #28:Having fun with QR codes


What are QR codes?

A QR code is a quick response code. There was a lot of interest in QR Codes at a professional learning session I presented to a group early years teachers this week.

There were lots of questions about QR codes, as promised here are some great ideas on how to use QR Codes in your classroom

Load a free QR code scanning app to your iPad, tablet or phone and see if you can read this QR code then start making your own QR codes

A QR code is a quick response code . It looks like a big bar code and contains data that can be read by a camera on a phone, a computer, an iPad or any tablet device.

A QR code

Scan this QR code

How do I read a QR code

You need to download a QR code reader this allows the camera on your device to scan the code and reveal the information it contains. Many of the QR code readers are  are free.

The QR code readers that I use are i-nigma and Q-rafter. To read a QR code select the QR code reader on your device. Hold it close to the QR code. It will very quickly take you to the URL or webpage  and will reveal the information embedded in the code.

What do I need to use QR codes in my classroom?

A QR code directs you to a website. To use this successfully in your classroom you need to have a good wifi system and devices that are able to connect to the web. You can use QR codes using your mobile phone data- parents can do this- but it could be expensive for students to connect using a 3G or 4G connections

How do I make a QR code?

To make a QR code you need to pro ( paid) version of the app. This allows you to insert a URL and generate your own code.

Why would I use a QR code?

A QR code is a quick way to take you to a site on the web without you having to type in a log URL. This makes it great for students to use, even the youngest students can point a device and scan the code. You can create QR codes to use in your classroom-
print the codes and place them on posters- students scan them to get more information,
use them in a treasure hunt- scan for the next clue,
place them on students’ artwork add audio to hear them telling their story,
put them in the school newsletter to take parents to your class blog site or link to an interesting website, the list is endless.

Create a Treasure hunt with QR codes- no wifi required

http://www.classtools.net/QR/

This site allows you to create a free treasure hunt or quiz using QR codes.

Develop your questions and type them into the space provided on the classtools site-

QR codes are generated for each question or clue- P

Print these and put them on display or hide them in the playground- students scan them uisng a qR code scanning app- Qrafter- I-nigma- the question is revealed -no wifi is required

Use Qr codes to gather responses from a group or class

Create a QR code using the URL to an online google form or an online form in Adobe Forms Central- students fill in the form and submit the information online- all information is collated in a spreadsheet

Get your students to create their own QR codes

The fun really starts when you get your students creating their own QR codes. Try this in your classroom and post a comment back on this blog to let use know how you are using QR codes.

How are teachers using QR codes?

Here are some links with great examples of QR codes in educational contexts

  1. Take a look at my Pinterest board to see some great ways to use QR codes
  2. Kathy gives some great ideas for using QR codes 
  3. Seven fun ways to use QR codes
  4. Exploring the educational potential of QR Codes.

Tips 2013 Professional Learning #26:Create and curate interactive content using iTunesU

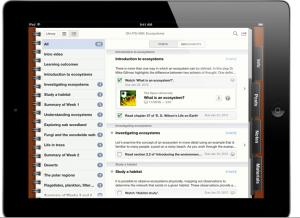
Screen Shot 2013-10-10 at 5.53.10 PM I frequently get asked by teachers,how do I create learning experiences for my students to use the features on the iPads?

I set out to  explore how teachers who don`t have web editing skills can do this in an easy way. I saw a lot of high end complex and expensive options that would not be of interest to busy teachers. Then I found some teachers  using using free software you can download on the web.

I was impressed at the amazing interactive resources teachers are developing for their classes using iTunesU and ibooks author.

These tools allow teachers to create their own interactive digital content that students can access on an iPad or a laptop. The iTunesU site also contains a wide range of material that teachers and students can access and customise. The great thing is it is all free. Lots of the content is created and shared by teachers. This teachers-2-teacher sharing of resources is a very positive and productive movement in education that benefits everyone.

A very exciting development is that I saw the students  creating their own ibooks and sharing them with their peers and their parents. Students can work together outside the classroom and collaborate on joint projects extending their learning. These ibooks can be included in iTunesU courses allowing shared ownership of the learning materials. When students are  looking for reliable content, making connection between sources they are engaging in higher order thinking and I have noticed how excited they get about learning.

You can get the free iTunesU app for the iPad Link

To start creating your own courses you need to set up an Apple ID. Then go to this site

http://itunesu.itunes.apple.com

Courses are created on a computer (MAC) and then loaded to the iTunesU site. Once in iTunesU courses can be shared with students privately by sending them a link or open access  freely available courses can be downloaded from the site. You can open all the courses on an iPad, iPhone or an iPod touch. Here are  guidelines on how to start building a course   Creating your course

There are a series of short webcasts that show you how it all works in the classroom

http://www.apple.com/au/education/itunes-u-series/

To explore the courses go to iTunesU and search the catalogue by topic, curriculum area or grade most are freely available for you do download.

Australian teachers have been busy creating courses aligned to the new Australian Curriculum to view these course search iTunesU for Australian Curriculum.


Tips 2013 Professional Learning #24:Using iPads for Professional Growth

We are working on the TIPS-2 Project. In this project we are using iPads and iPhones and iPod Touches as tools for teacher reflection and to document teachers professional growth. This is a very exciting project and we have some amazing teachers and school principals as part of the research team. There was lots of discussion on how we reflect on the Australian Teacher Standards (@AITSL) and share our practice at our  recent team meeting. We were joined by Samoa a fellow ADE from Korea who shared her experiences in developing a “flipped classroom”.

TIPS-2 Research Team

TIPS-2 Research Team @ECU with Dr Jenny Lane

I am looking forward to working with this great team to explore these exciting possibilities. If you are using iPads, iPhones or iPod touches in professional learning for teachers please post a comment we would be interesting in sharing ideas with you.

Tips 2012 Professional Learning #23:iPads as a productive tool

Investigate, Communicate, Create: Using an iPad as a productive tool in the classroom. Presenter: Dr Jenny Lane

We have a great group of over 250 teachers attending our session tonight. I do apologise to all those teachers who were disappointed because they did not manage to secure a seat to this presentation. I will be repeating this session next term. Thanks to all the teachers for attending this session and a special thank you to those who volunteered to share the amazing productive work happening in their classes and in their schools.

Tips 2012 Professional Learning #20:Which app is right for you?

When selecting apps my rule is “less is more”…In my experience it is better to have a few carefully selected apps that you can use in multiple ways than an app for every topic.

For many teachers at the start of a semester or the beginning of  a new school year you will be deciding which apps you will be using in your teaching. Selecting the right apps can be a challenge when there are so many applications on the app store. Always keep your educational objective clearly in focus, it is easy to be seduced by bright colours and cute animations. Think carefully about what the student will do… will this app allow the students to create, engage in higher order thinking and connect in new ways? There is some value in apps that allow students to consolidate their skills in an engaging manner. Apps that support the teaching  and can be used across the curriculum are good value per use as opposed to apps that will be used once or twice in a specific area.

A colleague Jan Clarke from AISWA has shared an extensive list of apps that she has complied. Classroom apps  Thanks for sharing all your hard work Jan. I look forward to hearing from you about the apps you find most useful in your teaching.

Tips 2012 Professional Learning #16:Creating and sharing learning online

One of the ways to create interactive online experiences is to use a learning management system (LMS). This is much easier than you think and is a great way to use mobile learning devices in daily classroom practice. These systems now incorporate social networking so students can create and share their learning as part of professional learning networks. There are a range of these, today I am discussing two free LMS systems designed for classroom use. Edmodo and Schoology.  I am seeing excellent use of  these systems in classrooms. Teachers can post tasks and assessments online in the password protected space they have created for their students. They can give parents access to sections of the site so parents can view the work. Students can access this work anywhere, anytime on a web enabled device. There are apps for Android and IOS devices like iphones and iPads. Students can post their responses to their teacher and work collaboratively with their peers. The facility to set up groups is very useful. The student work is all safely stored online, no need for complex server configurations.

Schoology

This video link guides you through how to set up a site in Schoology. Schoology has advanced features to set up test and assessments with self marking features.

Edmodo 

The Edmodo help site with very useful tips on everything you need to get this up and running in your classroom.

This post gives more details on how to use Edmodo in education

This post on edmodo gives lots of links to schools and blog sites with practical examples of edmodo in action
This video shows how a 5th grade student uses Edmodo

Please post a comment and share how you are using these tools in your teaching and learning

Edmodo touch app also available for android devices

Tips2013: Teachers’ Voices #4:Miss D & the Superstars

Add your own images to create personalised puppets

Add your own images to create personalised puppets

Miss D and her class the Superstars have been taking a journey back in time this term to celebrate the 75th anniversary of their school.


“The students worked in small groups using the Puppet Pals app on the iPads kindly lent to us by Dr Jenny Lane from Edith Cowan University. Our class has been lucky enough to take part in the TPACK Project, which is researching the integration of iPads into classrooms to help teachers successfully integrate this technology in the future.

Our class has loved using the iPads,  movies made with the Puppet Pals app show how our class has been reflecting on their learning in History this term and having lots of fun at the same time.”

Tamara Doig


Create your own animated puppet show

Create your own animated puppet show

Puppet Pals can be used for digital storytelling. Students develop a storyboard, create scripts with dialogue, design their puppets and select backdrops for the story.

This is a great tool for learning a second language because students have to narrate their story. The stories shared recorded and shared

Tips 2012 Professional Learning #10: Explore ECU with iPads

Welcome to the Clontarf Girls

For the Explore ECU Program today we welcomed the year 10 & 11 Clontarf Girls to spend a day experiencing University life with us on campus. We are going to be using technology in a fun way in to support learning.

Clontarf was one of the schools in Perth that the Queen visited when she was in Australia see the pictures on their website. Clontarf is a unique sporting academy with a specialist curriculum to develop the leadership skills of Aboriginal girls.

We had lots of fun – watch this space …

Clontarf girls become movie producers at ECU

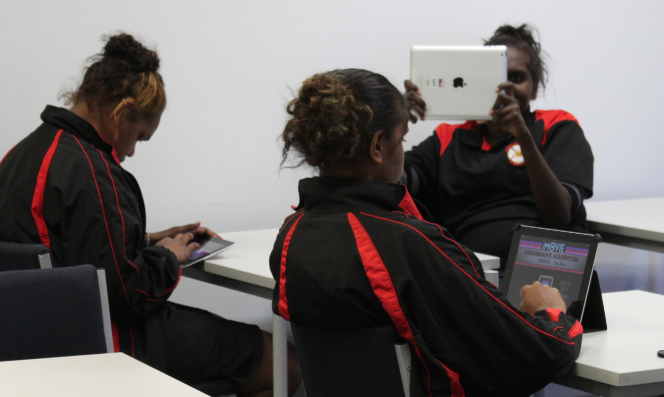
I was very fortunate to work with this delightful group of enthusiastic fun loving students. For many of the group it was the first time they experienced using an iPad. There was much laughter and excitement as they became movie directors for the day. We discussed creative ways of using mobile learning tools like phones and tablet computers for learning.

“Focus, action, shoot, let the camera roll”

For some more details on this event, click here.

We are celebrating NAIDOC Week at our university. NAIDOC Week celebrations are held in Australia in July to celebrate the history, culture and achievements of Aboriginal and Torres Strait Islander peoples.

NAIDOC is celebrated not only in Indigenous communities, but by all Australians. At Edith Cowan University we participated in a range of activities and to support our local Aboriginal and Torres Strait Islander community.

NAIDOC originally stood for ‘National Aborigines and Islanders Day Observance Committee’. This committee was once responsible for organising national activities during NAIDOC Week and its acronym has since become the name of the week itself.

Tips 2012 Professional Learning #9:Celebration of learning

I spent today enjoying a celebration of learning with Sarah and the fabulous teachers at Settlers School. It is always great to share ideas about teaching and learning with the teachers in the DET iPad Project.

It was such an inspiration to listen to Year 1 students confidently explaining to teachers and principals how they use apps to structure their story writing. These students were clearly enjoying their learning. One teacher commented ” when they are using the iPads the students are so motivated – they never get bored”.

I loved the use of peer tutors, where students who feel confident volunteer to help other students in the class. Using the iPads to record and review their own reading, the students did self assessments using a rubric to rate their progress.

The ShowMe screencasting app was used for number work. The students recorded their thinking processes and computations while solving number problems. They then projected their “show me” screencast on to the whiteboard and shared their strategies with the class. The tasks catered for students learning needs by providing a range of activities with students working at their ability level.

Well done to all the teachers and students for sharing such exciting work, and to Sarah and the team leaders for setting such a great example of transformative teaching.

Tips2012: Teachers’ Voices #3: Phil`s i-Story

Using iPads to teach English as a second language

Phil Rice is a teacher of adult ESL learners in the state of Delaware, USA. He has taught English Composition and multiple levels of ESL classes. He enjoys using technology to teach and help students to teach themselves. Phil is an avid user of iPads in his ESL classes, and he has shared some of the activities he uses in his teaching
Show me

Show Me

 Phil sent in this i-Story in response to a posting we did on using the Show Me screen casting app to read that post Tips2012 App Guide: Show Me. The Show Me app was also used for ESL teaching  in Schools in India as mentioned in Jude`s i-Story.
With ShowMe, teachers can…

1) Create an online lesson for an in-class topic. Record the main ideas of your lesson and give students a link or post your creation to an online social media site.

2) Have students create a narrated visual presentation on a topic using your/their iPad and show it in class as opposed to a “stand in front of the class” type presentation.

3) Create a Vocab Map using Skitch / DoodleBuddy and ShowMe together. Pick a picture that is related to a topic you are teaching and annotate it with Skitch showing the vocabulary for the picture. Then, upload the photo and use it on ShowMe to narrate and pronounce the vocab.

4) Download the presentation and upload it to YouTube so students have instant access to your ShowMes!

These are just a few uses for ShowMe. I use it all the time, and I’m sure that you will too once you get used to it.

Thanks Phil for sharing your i-Story.

You can visit Phil`s blog, ESL Commando, to find more ideas for using ICT in ESL classes.

Tips 2012 Professional Learning #7: Twilight Seminars

Keep calm and grab an iPad- Dr. Jenny Lane

M-Learning in Education@ECU

We had a great evening tonight in the first two session of our Twiilght Seminars@ECU, attended by over 350 teachers and school leaders.

Click here for a report on the M-Learning@ECU Events  Teaching with technology

The topic was M-Learning, “Learning using Mobile Devices”. We discussed the research findings in Phase 1 of the TPACK iPads in Schools Project. This research project investigates teachers’ needs as they work in new ways with iPads. This research is funded through my research fellowship and research grants and awards that I have received from Edith Cowan University. I discussed the rationale and theoretical background supporting the use of ICT in classrooms and gave examples of how school students embrace new technologies fearlessly.

Specialist consultants from from AISWA, Catholic Education and the Department of Education gave valuable insights on exciting projects and the teaching and learning strategies used in their schools.

Louise Cimetta and Caroline Mullins from Catholic Education enjoying M- Learning@ECU

Some of our fabulous teachers and industry colleagues shared their experiences introducing iPads and BYOD in schools, and told us about their favourite apps.
Tricky Tips on managing work flows, transferring documents to other devices, and how to select apps provided much needed technical information for all iPad users.

Thanks to Sarah, Ian, Doug, Jamie,Shaloni, Michelle, Louise and Jan for inspiring snapshots of their work.

Thanks to Madlen and the prac team helping organizing the event.

Tips2012 Professional Learning #6: Catholic Education

Sharing the learning from TIPS Research Project

I am looking forward to sharing the progress of the Tpack iPad Project in Schools with the management team at Catholic Education in Perth tomorrow.  I will be sharing some of the research findings regarding the needs of teachers for professional learning.

  • The role of ICT in the National Curriculum
  • The importance of the development of Professional Learning Networks.
  • The use of Social Networks as a professional learning tool.
  • The theoretical background framing the TIPS  research project
  • TPACK and the SAMR Model
  • How to plan using the Integrated Challenge Framework.
  • How to support teachers as they introduce iPad technologies in their classrooms.


Tips2012: Teachers’ Voices #2: Doug’s i-Story

A frequently asked question is “How do I transfer items created on my iPad to other devices?” This leads to the issue of workflows and document management on an iPad.

In this i-Story, Doug Lauder shares his thoughts on how to share content created on iPads. Doug works in education supporting teachers as they use technology.

He will be presenting on document sharing and workflows on iPads at the M-Learning in Education@ECU Twilight events on the 5th & 6th June at Edith Cowan University in Perth, Western Australia. These events are free for teachers and pre-service teachers. If you would like to join us use the booking link below:

Booking Form for the M-Learning in Education@ECU Twilight Events


iPad and sharing content in the classroom.

The most noteworthy aspect of the iPad is its’ simplicity. When providing Professional Development to teaching staff I normally ask that they forget everything they have learnt before about operating computers. I also ask that they leave behind any preconceptions of how the device works at the door. Don’t over complicate, just tap to get going.

But this is not easy, especially after many years of learning why file structure is important, how a “Home” folder works, and why “housekeeping” is not confined to just your house.

It is this file handling that is missing from the iPad, and it seems that it is Apple who are standing firm here, and for good reason. After all why do you need a music folder when you have iTunes? Pictures and video can be organised very well in the Camera Roll. Word processing now starts and finishes with Pages. But of course, there are times when we need to leave the Apple walled garden, for example; to collect, mark and return two dozen essays, animations or videos.

Email in the classroom
There are many apps which allow for content creation, notably iMovie and Garageband but also Sonic Pics, Comic Life and Photoshop Touch. How can I gather all of this media for assessment? Email is the quick solution, but this method is of no use if the iPad is a shared iPad with no email account assigned to the Mail app. As the recipient of 15-25 emails with attachments, the process is not practical either. Below I will illustrate a workflow which will work for a class set of iPads or a student personal iPad:

1. The Share Icon – to Camera Roll
This little icon is the key and there is one share destination which appears more than most and that is the Camera Roll. If we can export media to the local Camera Roll it is easy to get that to a conventional folder.

2. Dropbox
Dropbox currently have more than 50 million users, they are the cloud storage experts. App developers acknowledge this, and many are happy to allow direct export to the Dropbox app (if installed) from within their app (eg, Explain Everything). If the export to Dropbox isn’t an option from the Share icon simply choose Camera Roll (sometimes called Photo Roll).

3. Upload from Camera Roll to Dropbox
Dropbox allows you to upload content from your Camera Roll to a Dropbox folder of your choice. A good place for students to upload their work may be to a folder which is shared with the teachers personal account. That way the teacher can asses the work from iPhone, PC or Mac at his/her own leisure.

Drawbacks
Unfortunately all students who drop final projects into a shared folder can view the contents of that folder too. (and as yet it is not possible to create write only permissions to Dropbox folders). This isn’t a problem if you are using a shared class set of iPads in any case. But if each student has their own iPad, I would recommend that they open their own Dropbox account. That way you will be able to keep private folders with each student, if privacy is a must.

Conclusion
It may sound like I am on commission from Dropbox! But at this intermediate stage (between Lion – Mountain Lion and the expansion of iCloud) I don’t see a plausible workflow which replaces the file structure Dropbox allows us. Looking closely at iPhoto (for iPad) reveals a sharing option called Beam. Could this become standard for iPad communication in the future?

The workflow diagram above illustrates my favourite apps and how I transfer files around. I’m sure that I may have overlooked some “share paths” but I hope that it helps.
http://isupport.com.au
Doug Loader